
DIY Garage Ideas for an Organized and Efficient Space Every Homeowner Will Love
Table of Contents
Have you ever driven into your garage only to feel overwhelmed by piles of tools, sports gear, and seasonal decorations? You’re not alone—nearly 70% of homeowners report using their garage as a dumping ground rather than a functional extension of their home. But a well-organized, efficient garage can fundamentally change how your household operates, from creating a streamlined workspace to making space for hobbies or vehicles.
The good news is that you don’t need to hire a professional or empty your wallet to transform your garage. With thoughtful DIY garage ideas, a few smart storage solutions, and some effort, you can create a space that’s not just clean—but inspiring and functional. Imagine walking into your garage each morning and easily finding everything you need, with room to spare.
In this guide, we’ll cover practical ideas for garage wall systems, floor upgrades, storage solutions, tool organization, lighting enhancements, and even multi-use zones. Two detailed sections will delve into installing slatwall panels and designing an efficient workspace. By the end, you’ll have everything needed to upgrade your garage into an organized, efficient, and attractive space.
Smart Wall Storage Systems for DIY Organization
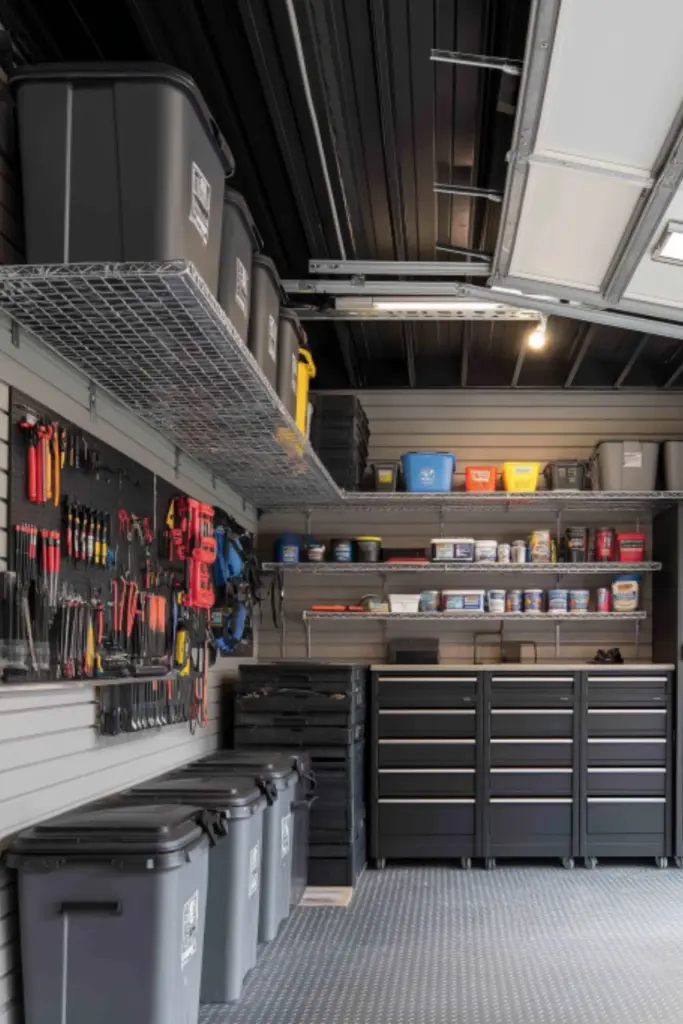
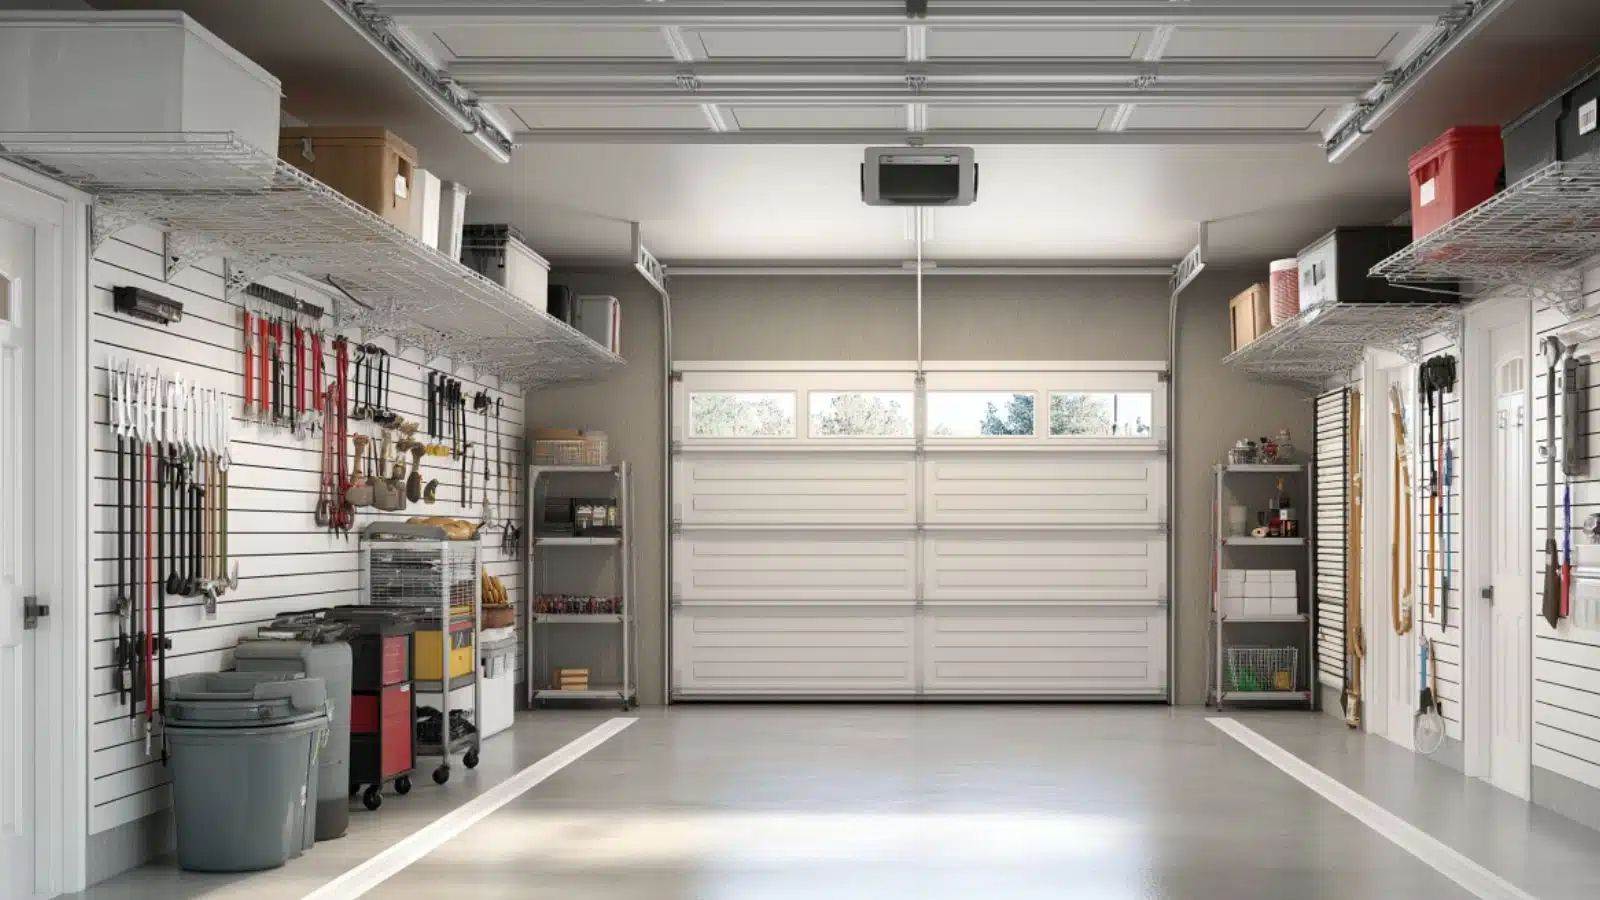
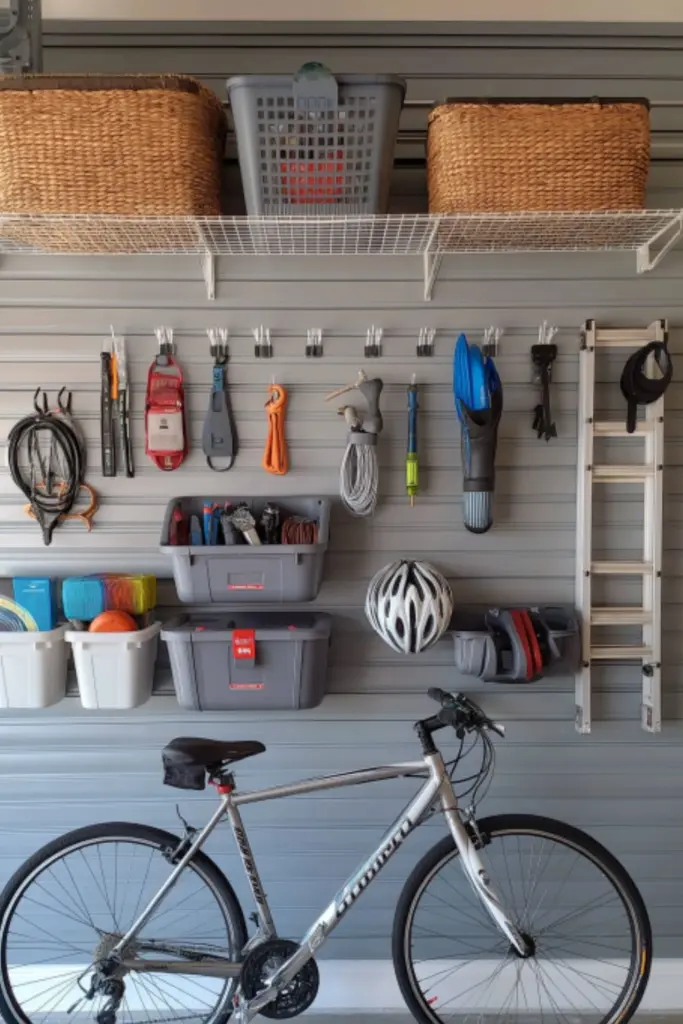
One of the most transformative DIY garage ideas is adding wall storage systems. By utilizing vertical space, you can dramatically free up floor area while keeping tools, equipment, and supplies accessible.
Common options include slatwall panels, pegboard sections, and ceiling storage racks. Slatwall boards—available in MDF, PVC, or metal—allow you to customize hooks, shelves, and bins. Pegboard offers a flexible backdrop for hand tools and smaller items. Ceiling racks hold bins of seasonal gear or bulky items.
Before installing, plan your layout: group like items together (garden tools vs. sports gear), measure load requirements, and choose materials suited to your garage conditions. Stain or paint panels for a polished look, and label bins or hooks for easy retrieval.
Table: Wall Storage Options Compared
| Storage Type | Best For | Pros | Cons |
|---|---|---|---|
| Slatwall Panels | Tools, bins, sports equipment | Highly customizable, sturdy | Requires studs/mounting support |
| Pegboard | Hand tools, small gear | Flexible, easy to rearrange | Weaker weight capacity |
| Ceiling Racks | Seasonal bins, bulky items | Saves floor space | Needs ceiling clearance, hardware |
| Magnetic Strips & Hooks | Metal tools/power cords | Sleek, accessible option | Limited to magnetic items |
Floor Coating Ideas for Durability and Cleanliness

Upgrading the garage floor is a common DIY garage idea that instantly improves cleanliness and visual appeal. A durable floor coating does more than look neat—it protects against stains, cracks, and wear.
Epoxy flooring systems come in water-based or 100% solids formulas. Water-based epoxy is budget-friendly ($1–$2/sq ft), while more expensive options ($3–$7/sq ft) offer thicker, longer-lasting finishes. Polyaspartic coatings cure fast, resist chemicals, and allow same-day use, but they are pricier.
Stained concrete presents an aesthetic upgrade with minimal prep—ideal for the DIYer with limited time. Alternatively, interlocking PVC or tile floor mats offer easy installation and quick pattern changes.
Table: Garage Floor Coatings Pros & Cons
| Flooring Option | Pros | Cons |
|---|---|---|
| Water-Based Epoxy | Affordable, stain-resistant | Thin finish, less durable long-term |
| 100% Solids Epoxy | Thick, high-gloss, easy to clean | Higher cost, needs thorough prep |
| Polyaspartic Coating | Fast cure, UV stable, resistant | Most expensive option |
| Stained Concrete | Budget-friendly, low prep | Offers less protection than epoxy |
| Interlocking PVC Tiles | DIY-friendly, replaceable, aesthetic | May warp under heavy vehicles |
Installing Slatwall Panels for Practical DIY Storage
Slatwall panels are among the most impressive of DIY garage ideas—offering flexibility, aesthetics, and increased efficiency in tool and gear storage. Here’s how to make it work for you.
Start with planning. Choose the panel material (PVC for moisture resistance, MDF for economy, or aluminum for strength). Measure your garage walls‚—leave dedicated zones for tools, sports, gardening, etc. Ensure you can mount the panels on studs; use furring strips if needed.
Tools needed include: level, stud finder, drill, screws, and a saw. Once installed, add customized hooks, bin rails, bike racks, and shelves. Paint or stain the panels before mounting for a cleaner finish. Keep heavy items (lawnmower, ladder) near ground level; store lighter gear higher up.
Maintaining an organized slatwall setup is simple: practice the “one-in, one-out” rule for new items, and adjust placement based on seasonal needs.
Table: Slatwall Installation Steps
| Step | Details & Notes |
|---|---|
| Measure Wall Space | Determine number of panels needed, account for outlets |
| Choose Material | PVC for wet/damp garage, aluminum for heavy-duty use |
| Locate Studs | Use stud finder; install furring strips if stud placement mismatched |
| Pre-Paint Panels | Cover grooves and edges before install |
| Mounting Panels | Use level and screws every 16″ into studs |
| Add Accessories | Hang hooks, baskets, shelves; group by category |
| Maintain Organization | Reevaluate seasonally, label bins, adjust layout |
Creating Multi-Use Zones for Hobby, Work, and Storage
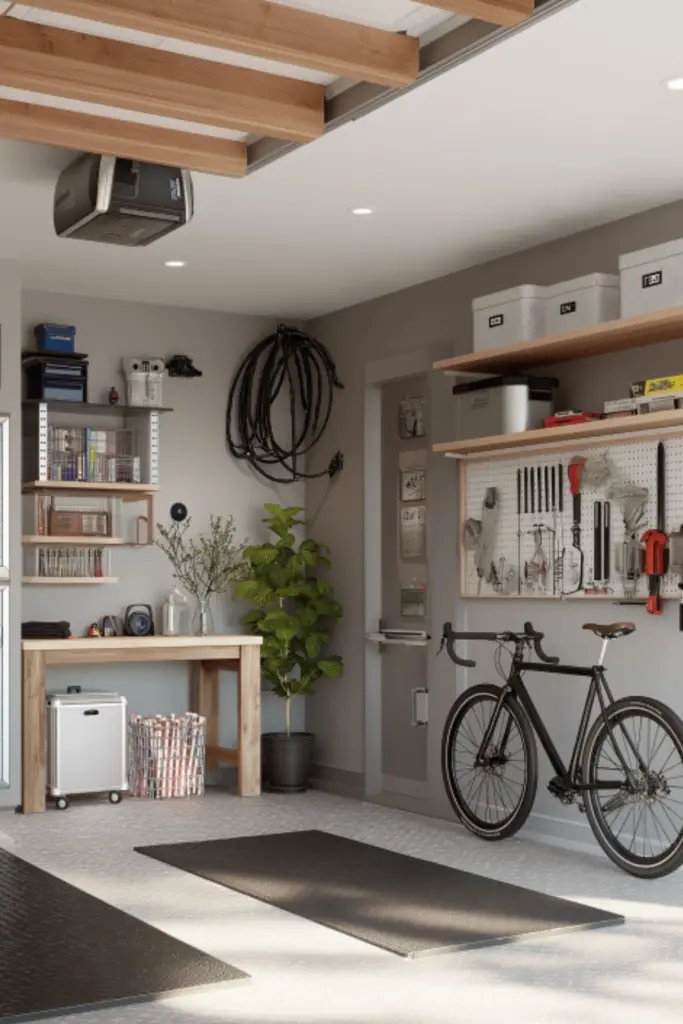
One of the most powerful DIY garage ideas is to segment the space into zones tailored to your lifestyle—including a workshop, fitness corner, or hobby area. This creates order and supports different functions without clutter overlap.
Zone planning begins with drawing a layout. Place frequently used areas, like a workbench, along well-lit walls. Allocate back corners to seasonal storage or lesser-used equipment. Use storage cabinets between zones as visual dividers.
Consider flooring transitions—epoxy under vehicles, rubber mats at workout zones. Lighting also varies per zone: bright task lighting for DIY workspaces, softer LED for casual areas. Clearly labeling and organizing each zone ensures things stay in their place.
Table: Garage Zones and Their Features
| Zone Type | Ideal Location | Key Features |
|---|---|---|
| Workshop | Along side wall | Pegboard, workbench, overhead lighting |
| Fitness Area | Back corner or garage side | Rubber floor mats, wall-mounted storage |
| Storage & Tools | Near entry or rear wall | Storage cabinets, ceiling racks |
| Vehicle Parking Zone | Middle of bay | Clean floor, no obstructions |
Designing a Functional DIY Workbench Workspace
If you want a garage that’s both organized and productive, the workbench area is key. It should feel efficient, ergonomic, and inspiring—a place where projects flow smoothly from start to finish.
Start with the bench itself. A sturdy base of 2x4s topped with butcher block or plywood is classic and DIY-friendly. Choose an MDF or laminated top for a smoother finish. Incorporate drawers and pegboard above for tools and supplies.
Maximize organization by installing a magnetic strip for hand tools, slotted containers for screws, and rolls for tape and paper. Lighting should include an adjustable desk lamp and overhead LED units. Add power outlets near the bench and an industrial-style tripod lamp for shadow-free lighting.
Consider incorporating a small vise or clamp system, a metal tool chest for small gear, and pegboard zones for power tools. Apply a coat of pegboard-oil finish to wood surfaces to prevent splinters.
Table: Workbench Workspace Essentials
| Element | Purpose | Tip |
|---|---|---|
| Heavy-duty Workbench | Core work surface | Use adjustable legs or screws for height |
| Overhead Lighting | Clear visibility | Use daylight LEDs at 5000K |
| Magnetic Tool Strips | Keeps tools handy | Mount at eye level |
| Pegboard Above Bench | Organizes tools and small parts | Paint pegboard to match wall color |
| Drawers and Bins | Organizes screws, bits, tape | Label each drawer for clarity |
| Adjustable Task Lamp | Directed light for precision tasks | Choose one with a long arm and shade |
| Vise or Clamp Mount | Secure workpieces | Mount near benchtop edge |
Efficient Lighting and Electrical Upgrades
Good lighting transforms a garage from dim to dynamic—another impactful DIY garage idea. Standard garage lighting often isn’t enough for detailed work or zone functionality.
Start with LED shop lights or overhead fixtures—install multiple rows for even coverage. Task zones like the workbench or hobby stations benefit from adjustable clamps or under-shelf lighting.
Additionally, add ample outlets—at least one every 6–8 feet—to avoid extension cords. Install USB outlets above the desk and bed area if it doubles as a guest space. Consider installing motion sensor lights for automatic illumination and energy savings.
Table: Lighting and Electrical Enhancements
| Upgrade | Benefit | Placement Idea |
|---|---|---|
| LED Overhead Shop Lights | Bright, efficient whole-garage lighting | Centered in ceiling bays |
| Task Lighting | Focused illumination for projects | Above workbench or desk area |
| Motion Sensor Switches | Hands-free lighting control | Near entry doors and garage access points |
| USB/Power Outlets | Convenient charging | Above desk, bedside tables |
| Wall-Mounted Lights | Cozy ambiance for multipurpose use | Next to guest bed wall |
Touch-Ups and Aesthetic Details for a Polished Finish
Once the major upgrades are in place, it’s the aesthetic touch-ups that polish the garage makeover. You’d be surprised how small decorative details can signal an organized, intentional space.
Consider painting doors and trim in a coordinating color. Add floor decals near zones to mark areas. Use matching containers and uniform labels. Introduce a featured accent wall behind the bench—maybe a bold color, mural, or binder rack with a contrasting finish.
Plant life adds warmth: place small potted succulents on shelves or windowsills. A clean welcome mat by the entry door invites.
Finally, finish with a catch-all basket for shoes, gloves, or seasonal items, and ensure walkways are clear.
Table: Finishing Touch List
| Detail | Impact | Example |
|---|---|---|
| Coordinated Trim Paint | Unified look | Charcoal gray or black trim |
| Zone-Specific Decals | Clear visual definition | “Workbench”, “Bike Station” decals |
| Potted Plants | Adds warmth and freshness | Succulents or snake plants |
| Labelled Containers | Easy item retrieval | Metal label plates on bins |
| Entry Mat | Defines transition area | All-weather mat by garage door |
Conclusion
With the right DIY garage ideas, you can transform your underutilized space into a model of organization and efficiency. From wave-transforming wall storage systems to durable floor coatings, versatile zones, a well-equipped workbench, smart lighting, and finishing touches—each element plays a role in creating a garage you’ll actually enjoy using.
By tackling one project at a time—whether that’s installing slatwall panels or finishing coated floors—you’ll make measurable progress. And each improvement brings immediate benefits: clearer space, easier storage, and a more welcoming environment. When you’re done, your newly organized, efficient garage will feel less like a chore zone and more like the powerhouse room it was always meant to be.