
Luxury Classy Kitchen Layout with Statement Island: Elegant Design Ideas
Table of Contents
Is your kitchen as stylish as it is functional? In today’s world, the heart of any luxury home is the kitchen—and at its center often sits a striking statement island. A well-designed kitchen island doesn’t just add workspace—it elevates the entire room, blending elegance, practicality, and show-stopping flair.
According to interior design trends, 78% of homeowners say the kitchen island is the single most desired feature in a luxury kitchen. It’s easy to see why: islands enable seamless entertaining, efficient cooking workflows, and a bold design focal point. But achieving that perfect layout—where flow, aesthetics, and materials all align—requires thoughtful planning and a confident eye.
In this post, you’ll discover how to design a luxury classy kitchen layout centered around a stunning statement island. From layout zones and upscale materials to lighting, seating, storage, and coordinating appliances, I’ll walk you through each key element. You’ll learn how to balance form and function, ensuring your island isn’t just beautiful—it supports how you live, cook, and entertain. Let’s transform your kitchen into a refined culinary sanctuary.
Enhancing Entertaining with a Statement Island
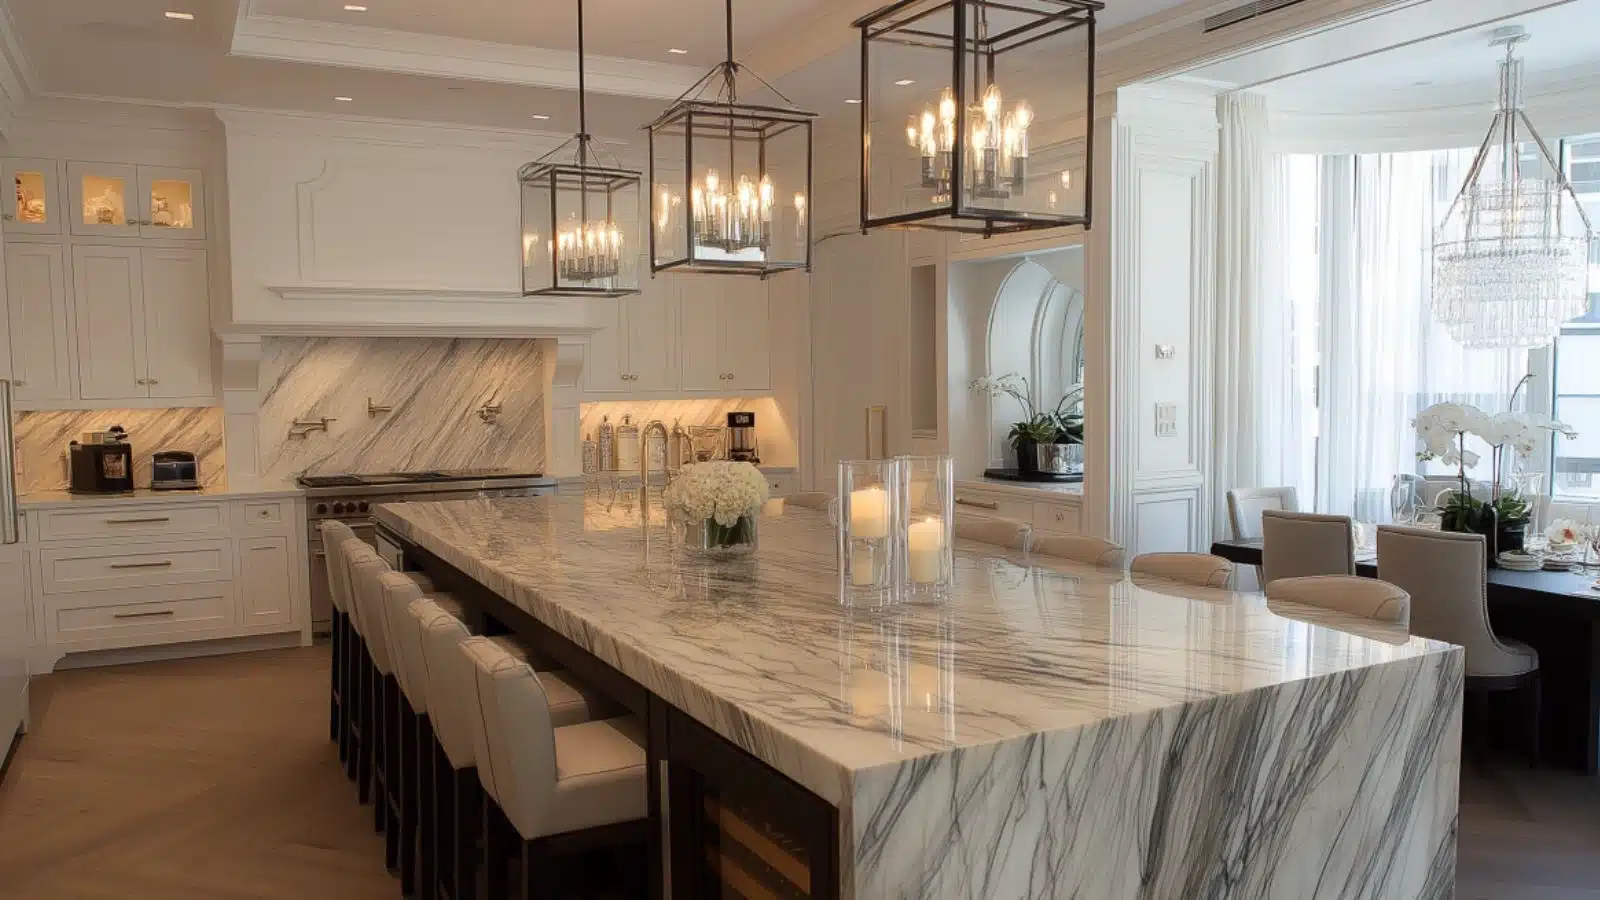
A classy kitchen layout goes beyond everyday cooking—it’s built for hosting. A thoughtfully designed island becomes the social anchor, accommodating prep, conversation, and shared experiences.
Begin by ensuring the island allows clear pathways: aim for at least 42–48″ of clearance on all sides to maintain easy movement. Include an overhang on one side—enough for bar stools and knee space—so guests can sit comfortably. Consider integrating a second sink or wine fridge to transform your island into a full-service hospitality zone.
Island Entertaining Layout
| Feature | Benefit | Recommended Size |
|---|---|---|
| Overhang | Casual seating | 12–18″ depth for bar stools |
| Prep Sink | Allows multitasking | Placement away from cooktop traffic |
| Wine Fridge | Enhances hosting | Compact 15–24″ under-counter fridge |
| Shelving | Display and access | Open or glass-front to showcase ware |
Optimizing Flow with Triangle and Work Zones
A classy kitchen layout relies on efficient workflow. Design your island to work within the classic kitchen triangle—stove, sink, fridge—to minimize steps and streamline prep, cooking, and clean-up.
Dedicate dedicated zones: cooking (cooktop and ovens), prep (sink and countertop), and cleanup (dishwasher, garbage). The island should support either prep or cleanup—allowing the main perimeter to house major appliances. This separates high-traffic areas and keeps the space feeling organized and elegant.
Work Zone Arrangement
| Zone | Ideal Location | Functionality Benefit |
|---|---|---|
| Cooking Zone | Along main wall | Keeps heat contained and visible |
| Prep Zone | On the island | Allows for spacious food prep |
| Cleanup Zone | Adjacent to island sink | Promotes easy dish workflow |
| Storage Zone | Drawer and cabinet perimeter | Keeps utensils and supplies nearby |
Selecting Luxe Materials for the Island Surface
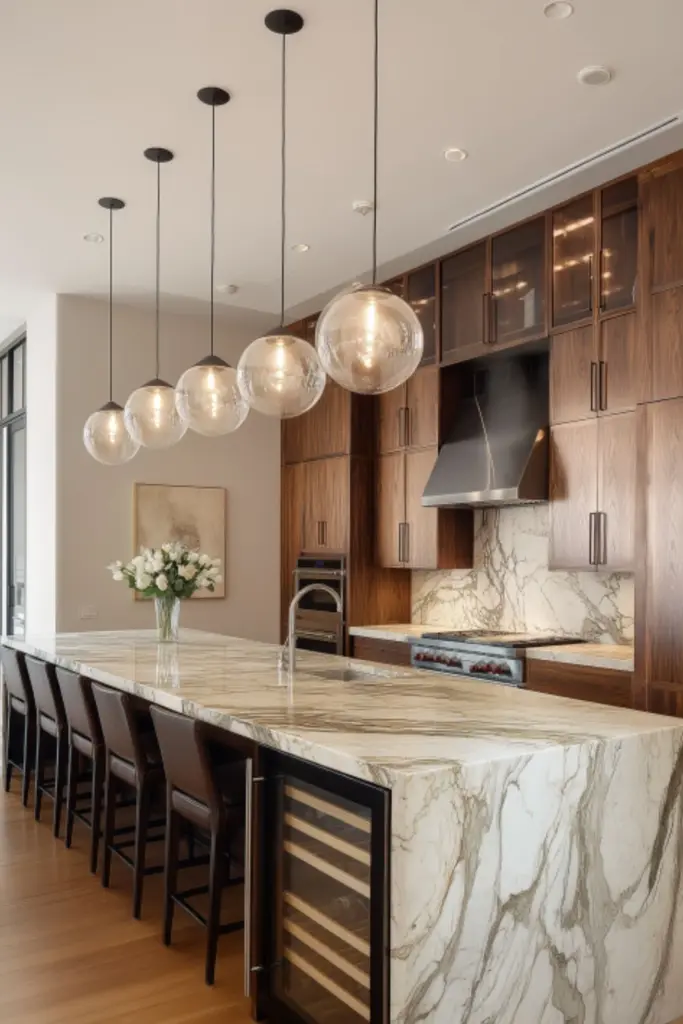
A statement island isn’t defined solely by size—it’s also an opportunity to introduce luxury through materials. High-end surfaces elevate style and durability.
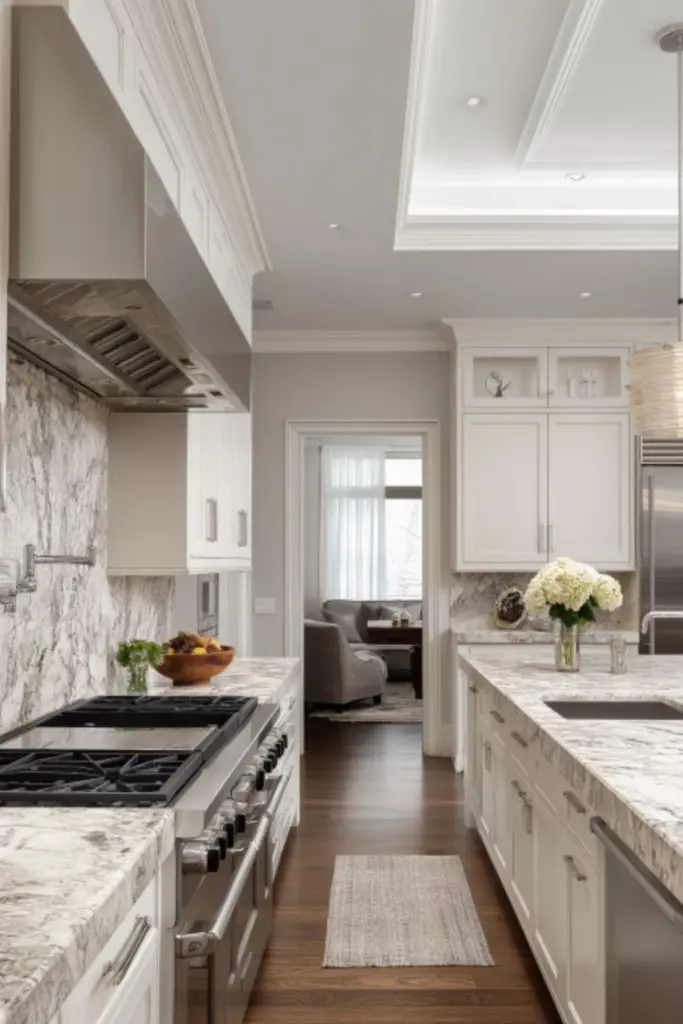
Natural stone like Calacatta or Carrara marble delivers timeless elegance with dramatic veining. For a warmer tone, granite in dark hues or soapstone offers depth and resilience. For modern flair, quartz or engineered stone in matte or polished formats mimics marble without the maintenance.
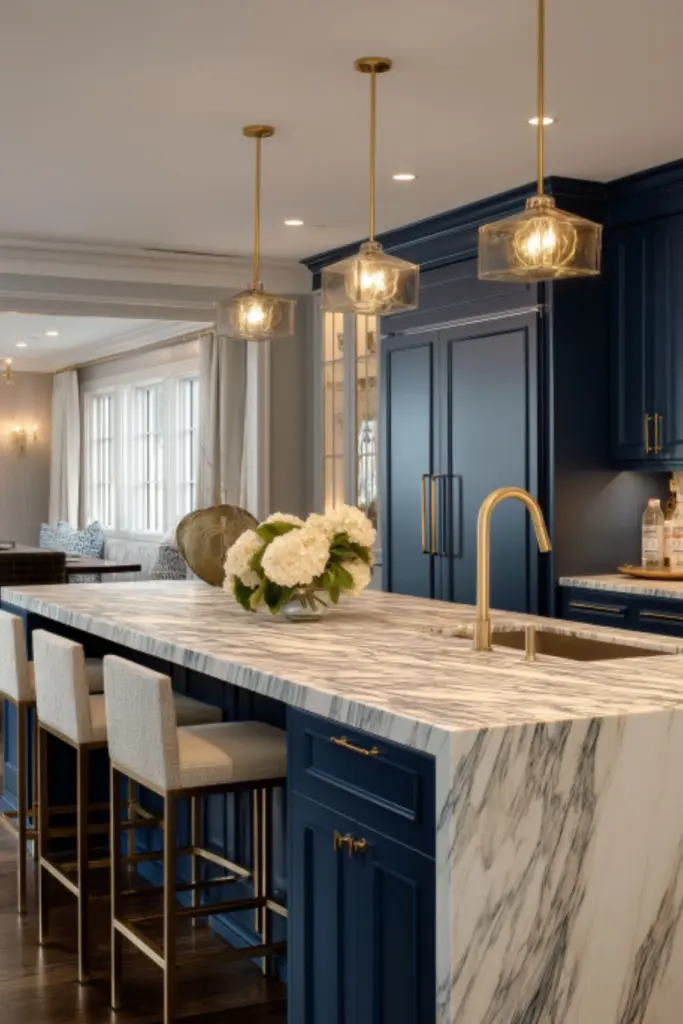
Pair island surfaces with complementary or contrasting cabinetry finishes. Light marble over dark navy cabinets makes a stunning statement; black granite over matte white cabinets feels ultra-sophisticated.
Island Surface Material Comparison
| Material | Benefits | Style Tip |
|---|---|---|
| Marble | Luxurious vein pattern, elegant | Use honed finish to reduce staining |
| Quartz | Durable and low-maintenance | Marble-look quartz for classic feel |
| Granite | Heat-resistant, natural | Pair with warm-toned island base |
| Soapstone | Rich, matte depth | Ages gracefully, softer patina |
Seating and Social Flow Around the Island
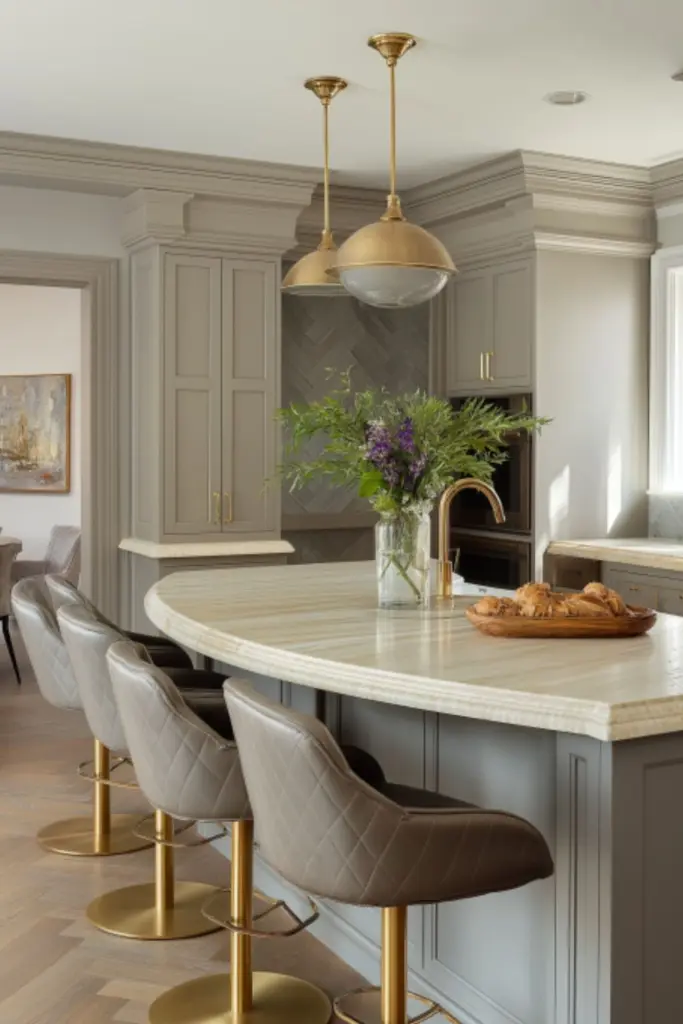
A luxury kitchen island becomes even more inviting when its seating feels integrated and refined. When planning seating, focus on balancing comfort, style, and proportion.
Start by choosing bar stool height aligned with island countertop—typically 24–26″ stools for 36″ counters or 28–30″ for 42″ tall islands. Designate a clear dining zone: stools grouped evenly, with at least 24″ of width per person.
For a cozy, conversation-enhancing layout, arrange the stools in an arc following the island curve, or choose linear layout for formal spaces. Curved islands require matching seating. Upholstered stools with back support and polished metal frames combine luxury and comfort.
Seating Planning Table
| Feature | Recommended Spec | Justification |
|---|---|---|
| Counter Height | 36″ or 42″ | Matches common stool-sized legs |
| Stools per Foot | 1 stool per 24″ | Ensures ample space and comfort |
| Stool Style | Upholstered, swivel, suitable | Offers time-tested coziness |
| Legroom | 9–12″ knee space under counter | Avoids cramped seating pressure |
Selecting complementary finishes—such as brass or leather—on stools ties the seating into the broader design. Rotate fabric or leather options seasonally or for occasions, maintaining freshness and customization.
Layering Lighting to Showcase the Island
Lighting transforms elegance. A statement island deserves layered illumination that balances task, accent, and mood lighting.
Pendant lights are the star fixtures over the island. Choose lengths and styles that complement other accents. For taller ceilings, feature large pendants; for lower ceilings, opt for flush or linear multi-light fixtures.
Under-counter lighting highlights stools, while LED strips in toe kicks cast a subtle glow. Task lighting integrated under upper cabinets supports prep flow. Add dimmers throughout to shift from bright prep lighting to intimate evening ambiance.
Lighting Strategy Overview
| Lighting Type | Fixture Example | Function |
|---|---|---|
| Pendant Lights | Large brass or stone pendants | Visual centerpiece |
| Under-counter | LED strips | Lightens shadowy foot space |
| Task Lighting | LED under cabinets | Supports chopping and prep |
| Ambient Lighting | Recessed dimmable ceiling lights | Balances brightness on demand |
An elegantly lit island draws the eye and heightens luxury. Rails or built-in dimmers offer maximum flexibility.
Smart Storage Solutions Within the Island
A luxury island is both beautiful and practical—the secret lies in smart storage. Integrate drawers, cabinets, and open shelves to keep essentials close while maintaining clean surfaces.
Incorporate deep drawers with full-extension hardware for cookware, utensils, or pantry items. Consider vertical compartments for cutting boards and trays. A built-in appliance garage—a hidden retractable door—lets small appliances stay out of sight yet ready.
Open shelving at the island ends can display decorative glassware, cookbooks, or artwork. Keep a built-in waste bin drawer near the prep area for seamless efficiency. Add spice pull-outs to maximize vertical storage.
Smart Island Storage Options
| Storage Type | Purpose | Design Tip |
|---|---|---|
| Deep Drawers | Pots, pans, dishes | Pair with drawer liners |
| Appliance Garage | Mixer, toaster hiding | Retractable door keeps island clean |
| Open Shelves | Cookbooks, dinnerware display | Style with books and plants |
| Pull-out Trash Bin | Near prep sink on island | Matches cabinet panels for cohesion |
Consider pull-out trays or recycling compartments tucked discreetly. Quality hinges and soft-close mechanisms maintain luxury standards. With these integrated systems, your island is stunning and purposeful.
Harmonizing Island and Kitchen Style
Your statement island is the focal point—but it should complement other kitchen elements. Coordinate cabinetry finishes, countertop materials, lighting hardware, and flooring tones.
If you choose a bold island color—such as charcoal or navy—repeat that shade subtly across window frames, pantry doors, or a floating shelf area. Incorporate island countertop material as a backsplash or trim accent in cooking zones for cohesion.
Flooring unites the kitchen; consider large-format tiles or hardwood in complementary tones. Rugs under tend to heat zones or softly divide kitchen and seating areas. Finally, weave in accent accessories—like brass fixtures or stone-based décor—to tie the island into the broader narrative.
Island Cohesion Summary
| Feature | Matching Element | Cohesion Strategy |
|---|---|---|
| Island Color | Accent cabinets or trim | Repeats focal hue in other zones |
| Countertop Stone | Backsplash or open shelf tops | Materials flow across spaces |
| Hardware Finish | Faucet, handles, chairs | Includes brass, nickel, or matte option |
| Rug or Flooring | Textural underfoot accent | Defines island seating area |
Conclusion
Designing a luxury classy kitchen layout with a statement island is about blending beauty, function, and flow. From establishing work zones and choosing opulent surfaces to coordinating seating, lighting, storage, and overall cohesion, every decision contributes to a refined culinary haven.
Your island can be a multifunctional luxury centerpiece—supporting cooking, entertaining, and aesthetic flair. Thoughtful layout, luxe materials, and smart design ensure that both form and function shine through.
With the ideas above, you’re well-equipped to craft a kitchen that’s not only stunning but seamlessly supports your lifestyle. Cheers to creating your dream luxury kitchen—where elegance meets everyday excellence.