

DIY Patio Projects for a Cozy Outdoor Living Area
Table of Contents
There’s nothing quite like stepping out your back door into an inviting, well-designed patio space that feels like an extension of your home. In fact, according to a recent Houzz study, over 70% of homeowners say outdoor living spaces have become more important than ever. Whether you have a sprawling backyard or a compact city patio, crafting a cozy outdoor living area is both attainable and rewarding—especially with a few smart DIY touches.
This guide is tailored to homeowners, renters, and weekend warriors looking to transform their patios without breaking the bank. From building budget-friendly fire pits to styling outdoor rugs and lighting, these DIY projects blend comfort, charm, and functionality. You’ll discover step-by-step breakdowns, material lists, and design ideas that are doable even for beginners.
Whether you’re hoping to entertain under the stars, create a quiet reading nook, or enhance your curb appeal, these patio projects will help you turn outdoor square footage into a dream-worthy escape. Let’s dive into the most effective ways to make your patio cozy, stylish, and uniquely yours.
Build a DIY Fire Pit for Warm Gatherings
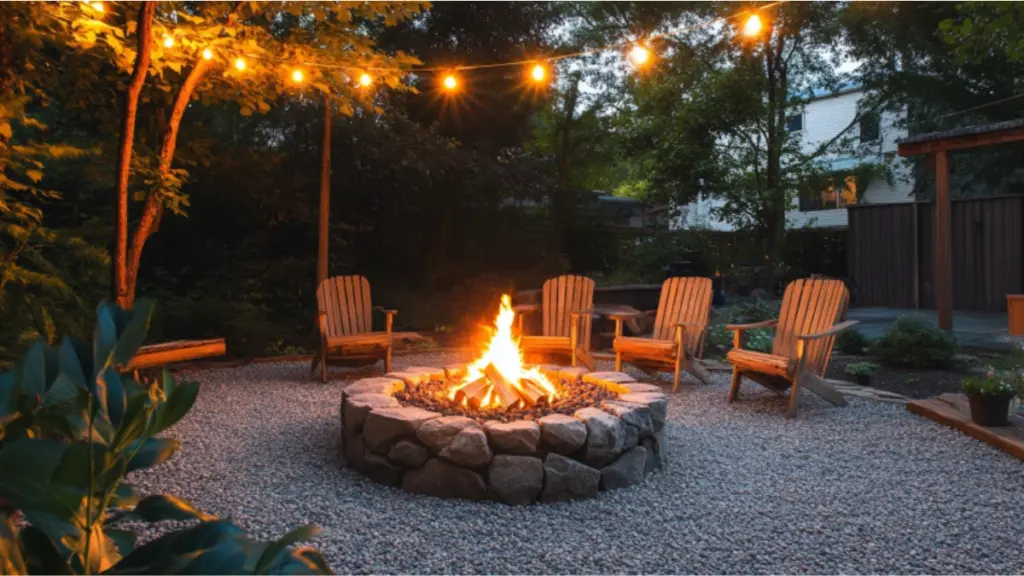
A fire pit instantly elevates any patio, creating a cozy ambiance and a focal point for gatherings. Fortunately, building one yourself is easier than it sounds.
Start with choosing the right location—ideally, a level spot away from overhanging trees or flammable materials. You can opt for a sunken, in-ground fire pit or a raised version using pavers or retaining wall blocks. Both versions require a gravel base for drainage and stability. Once the structure is set, finish it with fire-rated stones and consider adding built-in seating or portable chairs around it.
Step-by-Step Guide to a DIY Fire Pit
| Step | Task | Materials Needed |
| 1 | Mark your fire pit diameter | Rope, stake, spray paint |
| 2 | Dig a shallow base (6-8 inches) | Shovel |
| 3 | Add gravel for drainage | Crushed gravel |
| 4 | Stack pavers or fire bricks | Retaining wall blocks, adhesive |
| 5 | Finish with a fire bowl or grate | Fire ring or metal bowl |
This weekend project offers high visual impact with minimal cost—perfect for s’mores, evening chats, or even outdoor movie nights.
Install a Pergola for Shade and Style
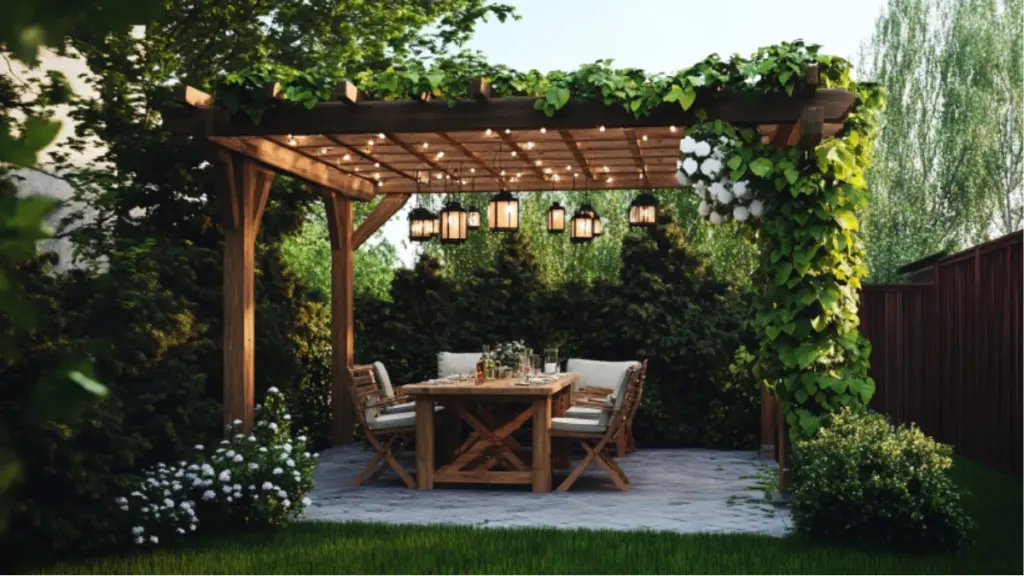
Pergolas provide shade, structure, and elegance to an open patio. They’re ideal for defining spaces without blocking out sunlight entirely. Even a simple pergola kit or DIY wooden structure can dramatically upgrade your outdoor area.
Construct your pergola with pressure-treated wood or cedar, ensuring it’s anchored securely to a patio slab or footings. Paint or stain it to match your home’s exterior, and consider adding climbing plants like jasmine or wisteria for a dreamy garden vibe. Solar string lights or hanging lanterns will complete the look at night.
Pergola Materials and Tools Checklist
| Materials | Tools |
| 4×4 or 6×6 posts | Circular saw |
| Crossbeams | Power drill |
| Joist hangers | Level |
| Outdoor screws | Post anchors |
| Wood stain or sealant | Ladder |
A pergola not only adds shade but also creates a structured space for outdoor dining or lounging, giving your backyard the feel of an outdoor room.
Create a Paver Patio on a Budget
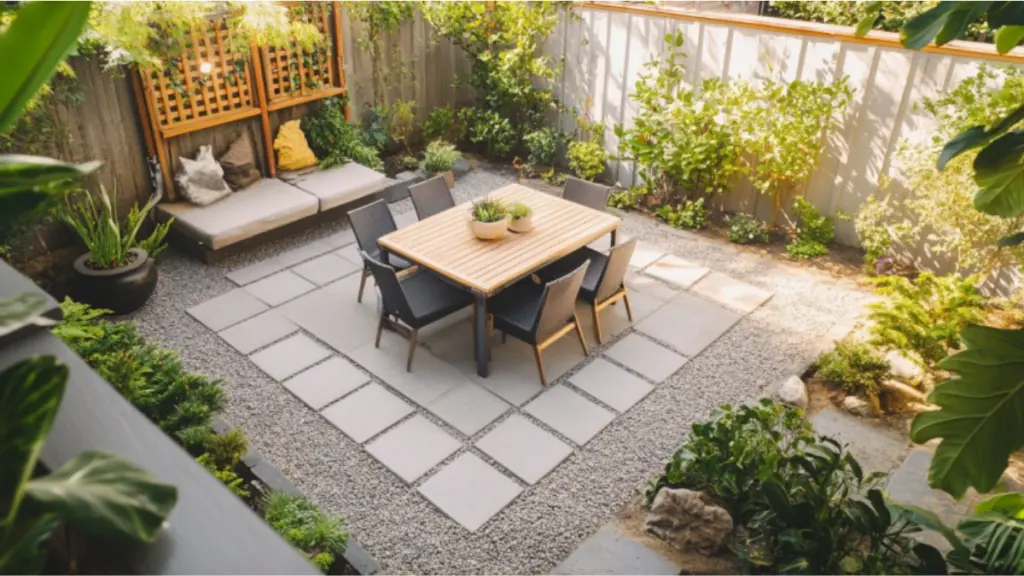
If your yard is more grass than patio, a simple paver setup can redefine the space. Installing a paver patio may sound labor-intensive, but it’s a DIY task that delivers impressive results—and it’s often more affordable than poured concrete or decking.
First, measure and plan the shape of your patio. Mark it with stakes and string, then excavate a few inches of soil. Add layers of gravel and sand, compacting each as you go. Lay your pavers in your desired pattern—herringbone and basket weave are popular options for visual appeal—and fill gaps with polymeric sand for a long-lasting finish.
Budget Breakdown for a 10×10 Paver Patio
| Item | Estimated Cost |
| Pavers | $150–$300 |
| Gravel and Sand | $100 |
| Landscape Fabric | $25 |
| Tools Rental (compactor) | $60–$80 |
| Total DIY Cost | $350–$500 |
This upgrade is perfect for renters too—opt for dry-laid pavers that can be removed later. Add a bistro table, outdoor cushions, and potted plants for a complete transformation.
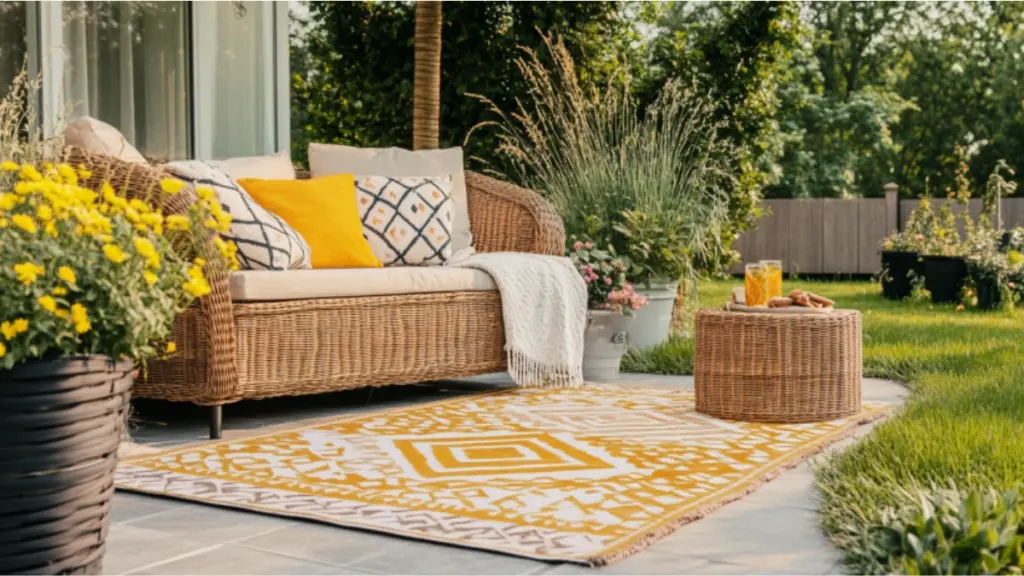
Design a DIY Outdoor Rug for Texture and Color
Outdoor rugs anchor furniture and add warmth underfoot. Instead of buying a pricey one, try creating your own using stencils and durable outdoor paint on a drop cloth or canvas.
Start by taping off your desired dimensions. Use geometric stencils or freehand patterns for a personalized look. Choose UV-resistant paint and seal the surface for durability. This project is especially great for adding pops of color to neutral patios.
DIY Painted Rug Materials Overview
| Item | Details |
| Drop cloth or canvas | Base material |
| Painter’s tape | To define edges |
| Outdoor paint | UV and moisture resistant |
| Stencils or brushes | For pattern design |
| Clear sealant | To weatherproof the surface |
This budget-friendly project is perfect for renters or seasonal decor updates.
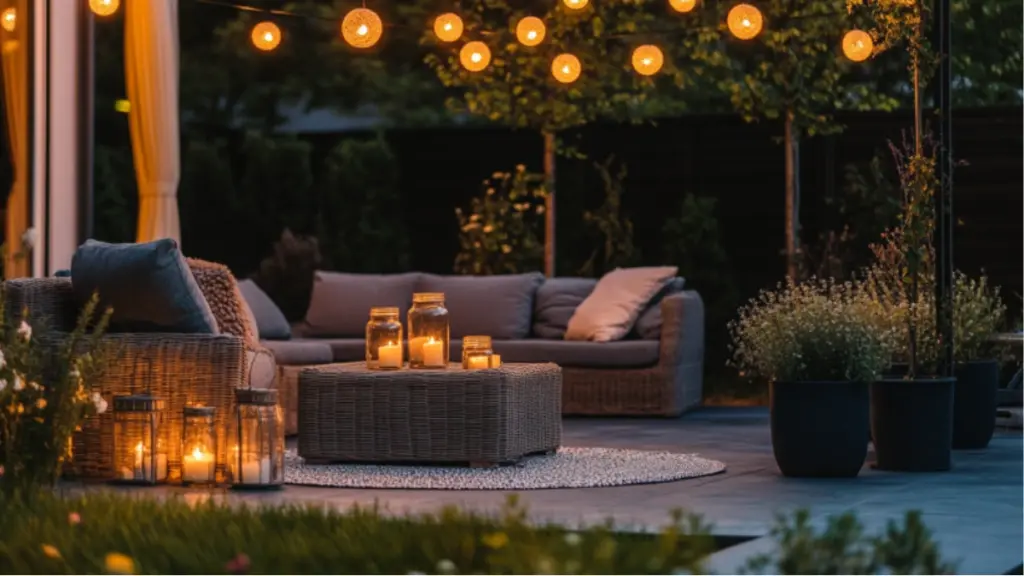
Add Ambient Lighting for Nighttime Charm
Lighting is essential for transforming a patio from practical to magical. DIY lighting projects range from hanging café lights to crafting mason jar lanterns or even solar-powered pathways.
Start by outlining areas to illuminate—dining space, seating, and walkways. Use outdoor-rated string lights overhead, install stake lights along garden beds, or suspend lanterns from shepherd hooks. Solar options are perfect for hands-off maintenance.
Lighting Options and Where to Use Them
| Type of Light | Best Placement | Cost Range |
| String/Café Lights | Overhead | $30–$80 |
| Mason Jar Lanterns | Tabletops/hanging | $10–$25 |
| Solar Stake Lights | Walkways/garden | $20–$60 |
| LED Strip Lighting | Under furniture | $15–$40 |
The warm glow of layered lighting adds depth and creates an intimate environment perfect for relaxing or entertaining after sunset.
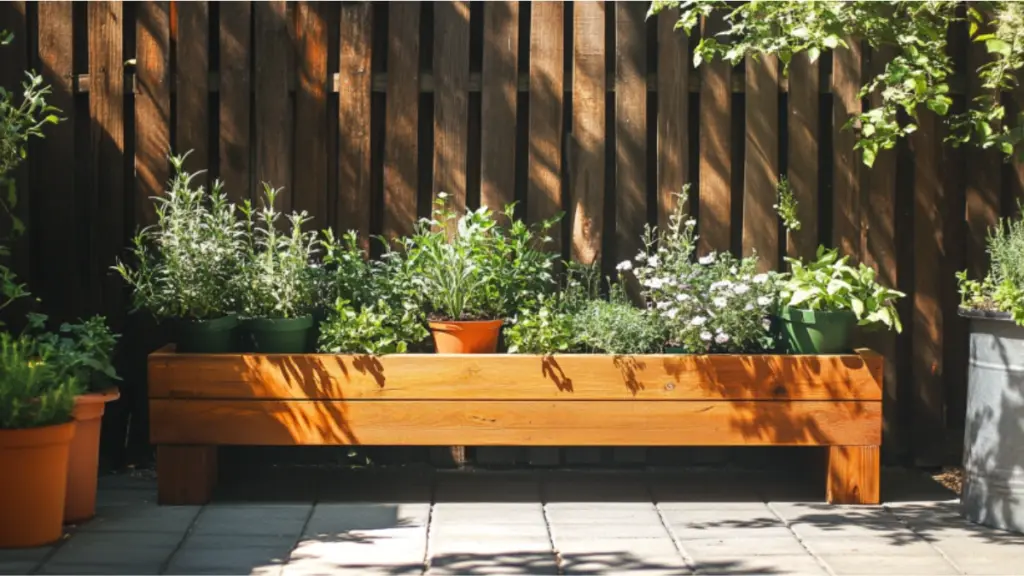
Create Built-In Planter Benches for Dual Functionality
Why not combine seating and gardening into one beautiful DIY piece? A planter bench lets you grow herbs or flowers while providing a place to sit. Construct the bench using weather-resistant wood, and line the planter sections with plastic or galvanized steel to protect the wood from moisture.
You can build a freestanding unit or attach it along a wall or fence. Choose low-maintenance plants like lavender, succulents, or ornamental grasses to reduce upkeep.
Planter Bench Features
| Feature | Description |
| Seating Surface | Pressure-treated slats or composite |
| Planter Sections | Framed ends or center inserts |
| Drainage Layer | Pebbles or sand at the base |
| Liners | Plastic or waterproof barrier |
A planter bench maximizes small spaces while blending form and function in the most charming way.
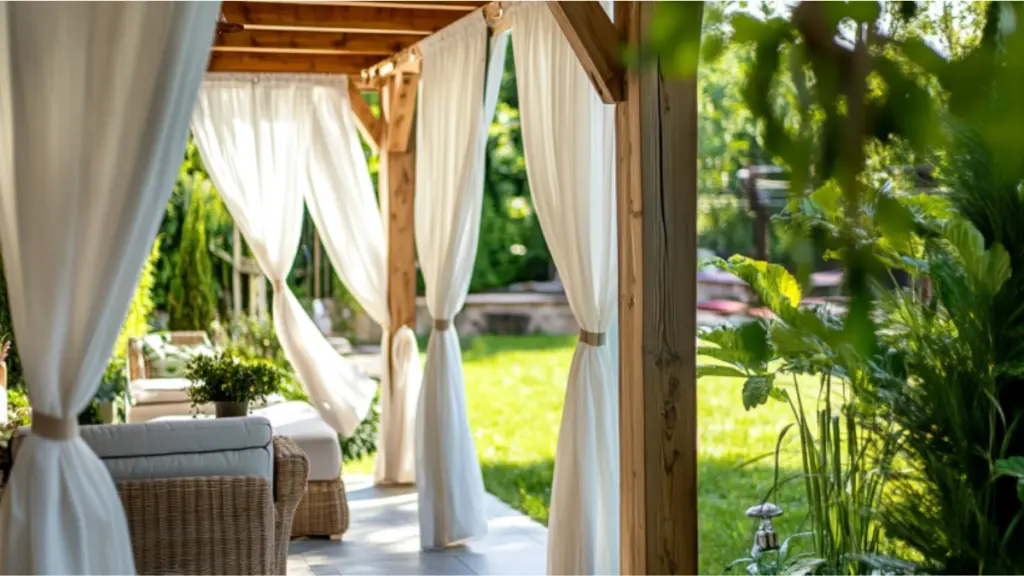
Use Outdoor Curtains or Privacy Screens for Seclusion
Create a more intimate setting by adding DIY outdoor curtains or privacy screens. These additions define your space and block out wind or nosy neighbors.
You can build a wooden frame and hang fabric panels using curtain rods or hooks. Alternatively, use lattice panels or tall planter boxes with bamboo inserts for a more natural look. Choose weatherproof fabrics that dry quickly and resist mold.
Privacy Screen Style Ideas
| Style | Materials | Look |
| Curtain Panels | Outdoor fabric, rods | Elegant & airy |
| Lattice Walls | Wood or PVC | Cottage or garden feel |
| Vertical Garden Screens | Wood + planters | Lush & modern |
This DIY not only increases privacy but also adds a layer of softness and movement to your patio.
Conclusion
Designing a cozy patio doesn’t require a hefty budget or professional crew—just a bit of creativity, time, and the right DIY approach. Whether you’re roasting marshmallows around your handmade fire pit, lounging under a vine-covered pergola, or admiring your custom-painted outdoor rug, each project enhances the comfort and personality of your outdoor living area. Let your space evolve one weekend project at a time, transforming even the smallest corner into a cozy retreat worth enjoying year-round.