
Weekend DIY Upgrades That Make a Big Impact on Your Home Decor
Table of Contents
Sometimes, a home refresh doesn’t require a major renovation—just a weekend and a little creativity. In fact, studies show that small, thoughtful changes in your environment can significantly boost mood and productivity. Whether it’s swapping out hardware, giving a tired wall a splash of color, or updating your lighting, DIY upgrades offer a rewarding way to personalize your space without a hefty price tag.
This guide explores a range of weekend DIY projects that are ideal for beginners and seasoned decorators alike. Each project is designed to make a big visual or functional impact while keeping your time and budget in mind. From creating an accent wall to upgrading your entryway, these ideas help transform your home one project at a time. We’ve also included easy-to-follow visuals, step-by-step checklists, and MidJourney prompts for visual inspiration.
If you’re looking for high-reward upgrades that are achievable in just a couple of days, keep reading—this list is full of creative, stylish, and practical solutions to elevate your living space.
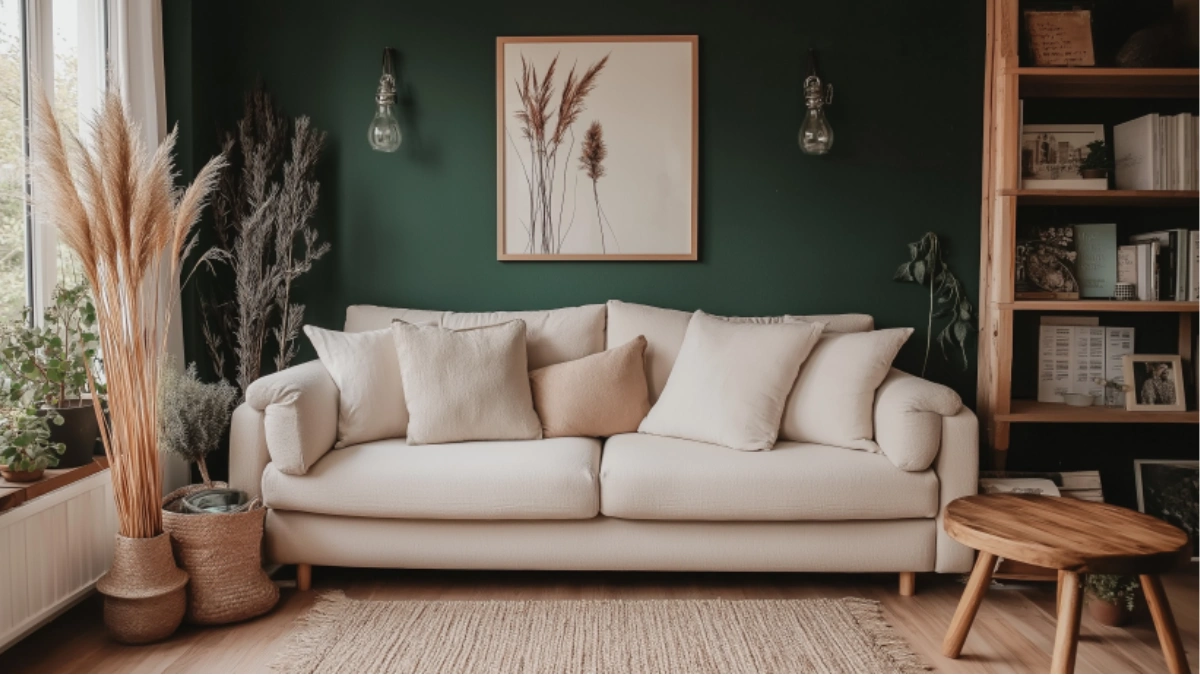
Paint an Accent Wall to Instantly Transform a Room
Nothing updates a room faster than a fresh coat of paint—and an accent wall is the quickest way to add drama without painting an entire space. Whether you opt for a bold hue or a subtle shade, this upgrade provides a strong visual anchor and refreshes your entire room’s vibe.
Start by choosing the right wall—usually the one behind your headboard, sofa, or main feature of the room. Select a paint color that complements your existing decor. Deep greens, moody blues, or even terracotta tones are trending choices for a sophisticated look.
Use painter’s tape to ensure crisp lines, prep your wall with primer, and block off a few hours to complete the project. For added texture, consider paint techniques like sponge finishes or geometric designs using stencils.
How to Paint an Accent Wall
| Step | Task | Tips |
| 1 | Choose the wall | Feature walls work best—behind beds, sofas |
| 2 | Select your color | Use color samples to test under lighting |
| 3 | Prep the wall | Clean, sand, and tape off edges |
| 4 | Apply primer | Helps paint adhere and last longer |
| 5 | Paint your color | Use two coats for full coverage |
| 6 | Remove tape carefully | Do it while paint is still slightly wet |

Swap Out Cabinet Hardware for an Instant Style Boost
One of the easiest weekend upgrades is replacing cabinet hardware in kitchens, bathrooms, or even dressers. It’s a subtle change with a surprisingly big impact on the room’s overall aesthetic.
Choose finishes that align with your home’s style—brushed brass for glam, matte black for modern, or aged bronze for farmhouse charm. You can even mix finishes for a curated look, as long as you keep the shapes consistent.
Installing new hardware usually takes just a screwdriver and a measuring tape. Be sure to measure the hole spacing on your current hardware to avoid needing to drill new holes.
Hardware Styles by Aesthetic
| Style | Finish Options | Best For |
| Modern | Matte black, chrome | Sleek, contemporary kitchens |
| Farmhouse | Oil-rubbed bronze | Rustic, cozy spaces |
| Glam | Brushed brass | Elegant, chic interiors |
| Coastal | Brushed nickel | Light and airy rooms |

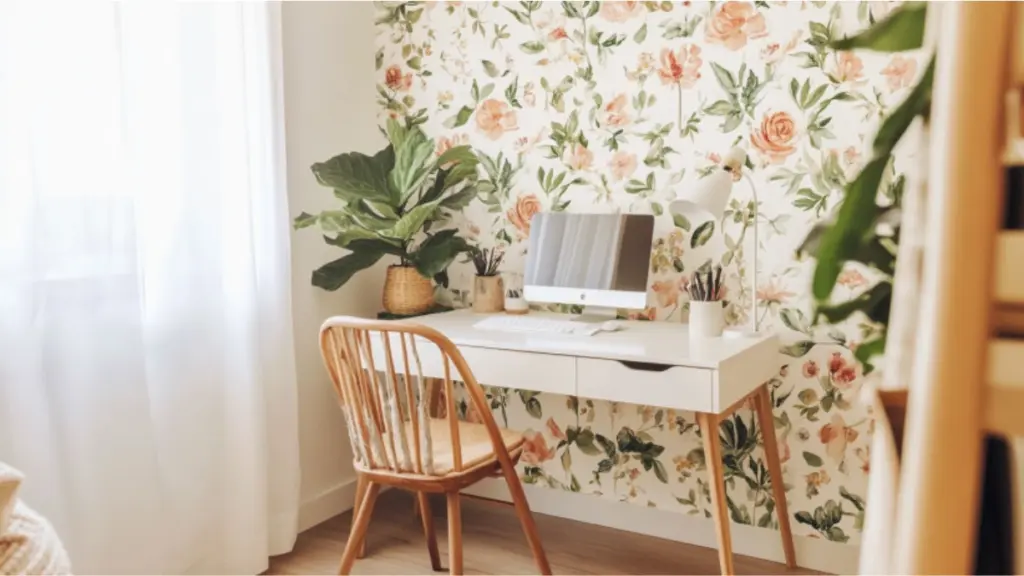
Add Peel-and-Stick Wallpaper for an Effortless Statement
Peel-and-stick wallpaper is a game-changer for DIY decorators. It’s renter-friendly, easy to apply, and instantly elevates blank walls, backsplashes, or even furniture fronts.
Start by measuring your surface area and choosing a design that suits your style—floral prints, geometric patterns, or faux textures like marble or shiplap. Clean the wall, peel back a portion of the wallpaper, and use a smoothing tool to avoid air bubbles as you apply it.
This upgrade works beautifully behind bookshelves, in powder rooms, or as a backdrop for a workspace.
Where to Use Peel-and-Stick Wallpaper
| Location | Design Tip |
| Entryway Nook | Use bold patterns for a welcoming feel |
| Bookshelves Back | Add depth with subtle geometric print |
| Powder Room Wall | Choose playful or dramatic designs |
| Kitchen Island | Try faux wood or shiplap for texture |
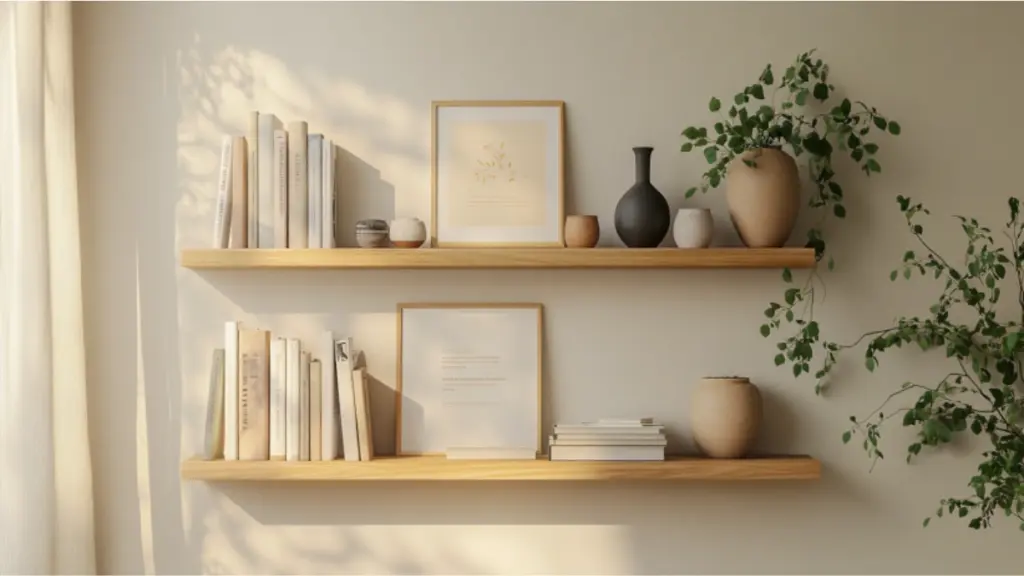
Create a Built-In-Look with Floating Shelves
Floating shelves are not just functional—they also add architectural interest to bare walls. They’re perfect for living rooms, kitchens, bathrooms, or hallways.
Choose shelves in a wood tone that complements your existing furniture. Use a level and anchors to ensure stability. Once installed, style them with layered objects—think stacked books, ceramic vases, and small framed art.
For the best visual effect, use a rule of thirds and vary object heights and textures.
How to Style Floating Shelves Like a Designer
| Styling Element | Example Items |
| Base Layer | Books laid flat, boxes, or trays |
| Height Layer | Vases, tall frames, or candlesticks |
| Texture Layer | Plants, woven baskets, or stone objects |
| Personal Layer | Photos, mementos, or small art pieces |
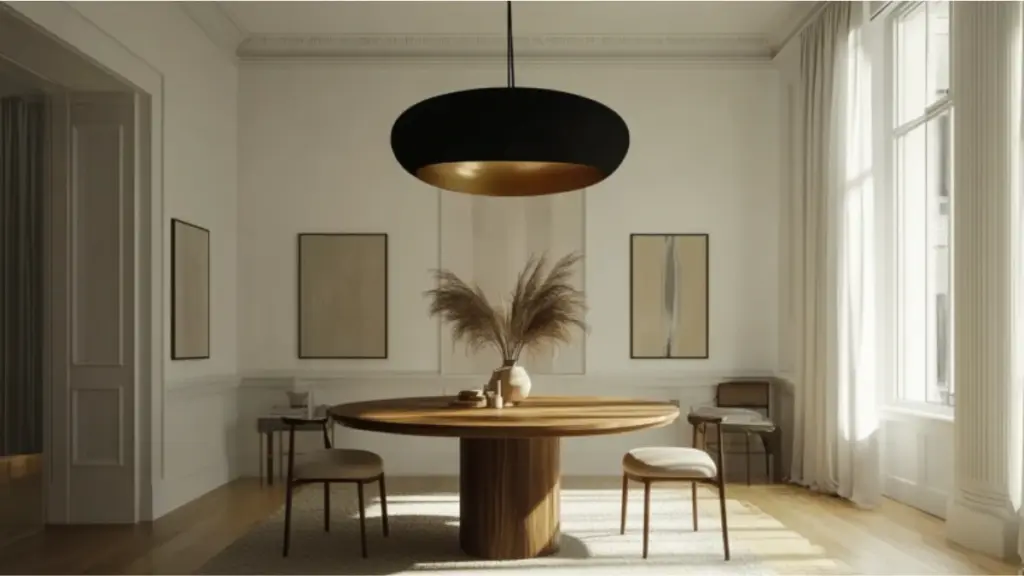
Update Light Fixtures to Refresh the Room’s Ambience
Lighting can completely transform the look and mood of a room, and swapping out fixtures is a surprisingly simple weekend project.
Whether you install a new pendant light over your dining table or add wall sconces for cozy ambiance, a new fixture brings personality and style. Opt for vintage brass for a warm glow, or go modern with matte black or globe glass fixtures.
Always turn off the power at the breaker before replacing any light fixture and follow instructions carefully—or consult an electrician if unsure.
Lighting Fixture Ideas by Room
| Room | Fixture Idea | Style Impact |
| Dining Room | Large pendant or chandelier | Creates a focal point |
| Bedroom | Matching wall sconces | Soft, romantic glow |
| Kitchen | Industrial island pendants | Functional + stylish |
| Bathroom | Globe vanity lights | Clean and modern |
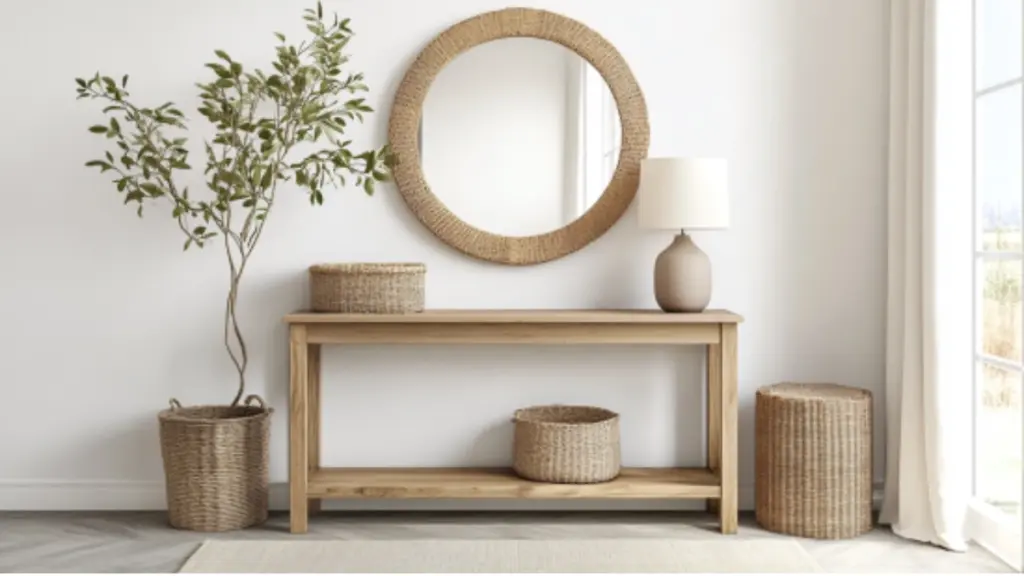
Upgrade Your Entryway for a Stylish First Impression
Your entryway sets the tone for your entire home, and a few quick upgrades here can make a lasting impact. Start with a narrow console table or bench—both stylish and functional. Add a mirror above to reflect light and create a sense of space.
Layer in baskets for storage, a small rug for warmth, and decorative accents like vases or a lamp. If you have wall space, install hooks or a coat rack for added utility.
This area can go from cluttered and bland to polished and welcoming in just one weekend.
Entryway Styling Formula
| Item | Purpose |
| Console or bench | Storage + style base |
| Mirror or artwork | Adds height, light, and interest |
| Basket or tray | Organizes mail, keys, or shoes |
| Rug | Defines the space and adds warmth |
| Lighting | Sets the mood—try a small table lamp |
Consider seasonal updates too. Swap out florals, artwork, or pillows to match the time of year.
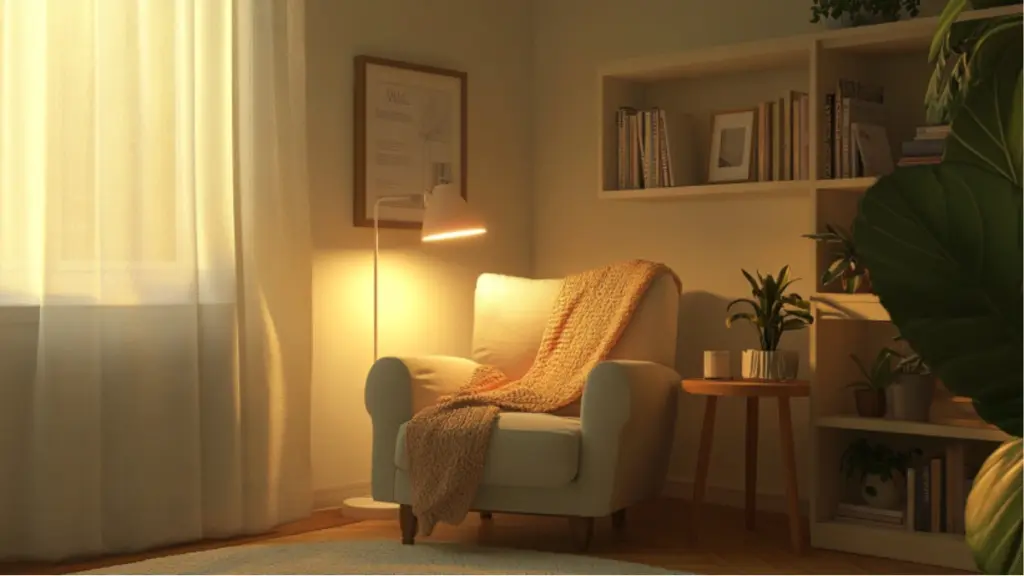
Create a Cozy Reading Nook in Any Corner
You don’t need a whole room to carve out a peaceful retreat. A reading nook can be created in any small corner, window seat, or underused area with the right elements. Start with a comfy chair—an overstuffed armchair, a floor cushion, or a window bench will do.
Layer the space with soft throws, textured pillows, a side table, and a good reading lamp. Add shelving nearby to house your favorite reads, and tuck in a plant for life and color.
This project is ideal for weekend transformation and adds both charm and purpose to a forgotten spot.
Elements of the Perfect Reading Nook
| Element | Details |
| Comfortable Seat | Armchair, bench, or pouf |
| Lighting | Floor lamp, wall sconce, or string lights |
| Textiles | Throw blanket, soft cushions |
| Storage | Side table, small shelf, or basket |
| Atmosphere | Plant, candle, art, or scent diffuser |
Whether tucked into a hallway, beside a window, or at the foot of a bed, a reading nook is a timeless way to cozy up your home.
Conclusion
You don’t need to break out the power tools or empty your savings to make your home feel more stylish and inviting. With just a weekend and a little effort, these DIY upgrades can transform how your space looks and feels. Whether you’re adding character with floating shelves, refreshing a room with peel-and-stick wallpaper, or creating a personalized nook to escape to, small changes can make a big impact.
The key is choosing projects that balance beauty with function and can be completed in a short timeframe. Start with one upgrade this weekend and watch your home evolve—one cozy, creative improvement at a time.